Getting started with the Content Management System
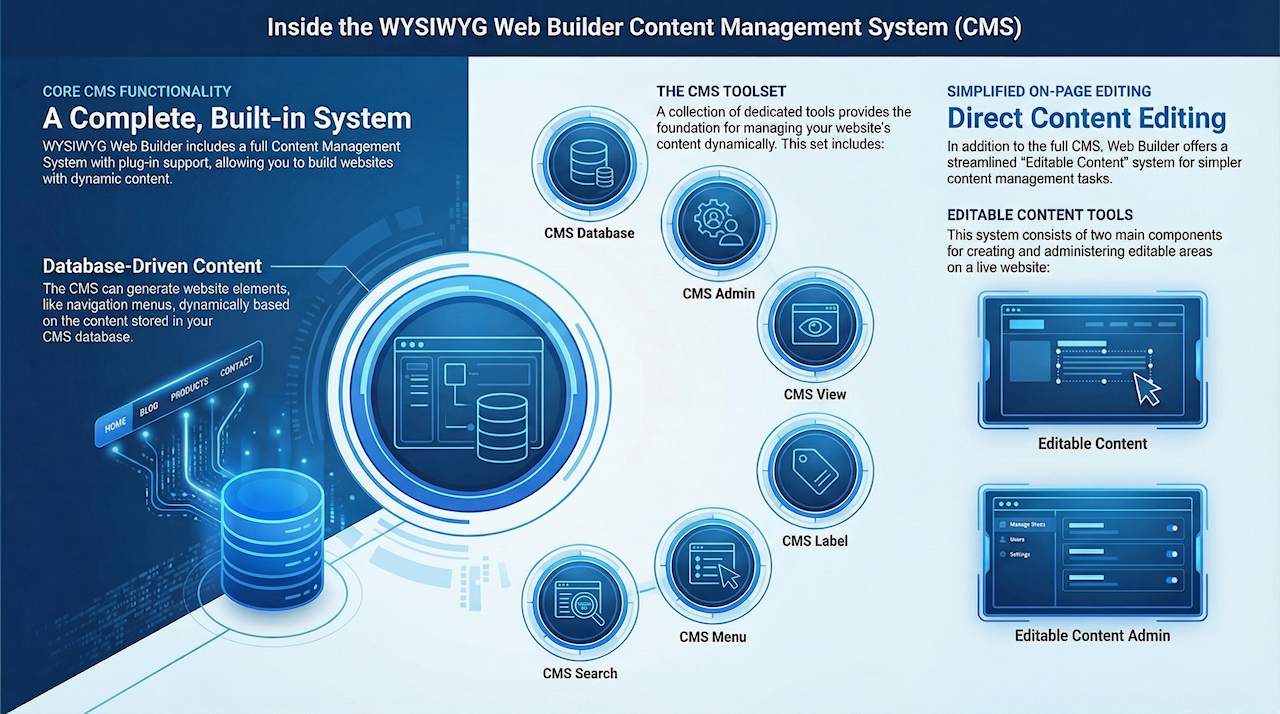
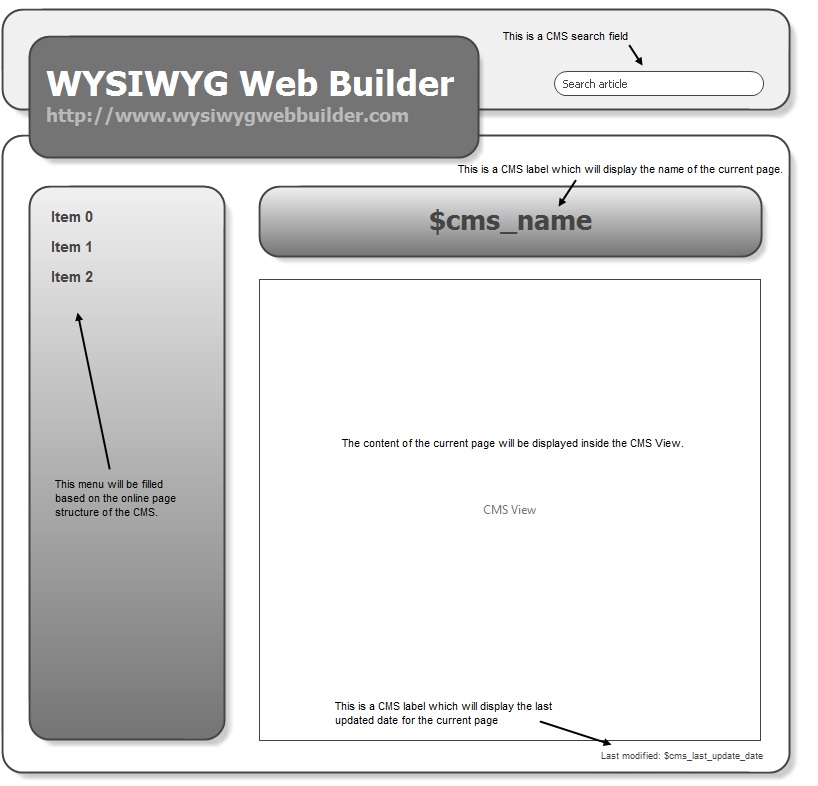
The basic idea is that the content of the page will be displayed inside a fixed area on the page, this is the CMS View. You can think of this as a frame or content place holder, although the content will be dynamically merged with the rest of the page when the page is requested from the server. Basically this means that you only need only one page for the entire website and the rest of the content is managed on the server. The layout of the page (also called the master border) can be designed with the standard WYSIWYG Web Builder tools. The navigation (CMS Menu) will be automatically generated based on the site structure on the server, so you don't have to fill the menus manually.
Key Features
- Online administrator panel to add/edit/copy and remove pages.
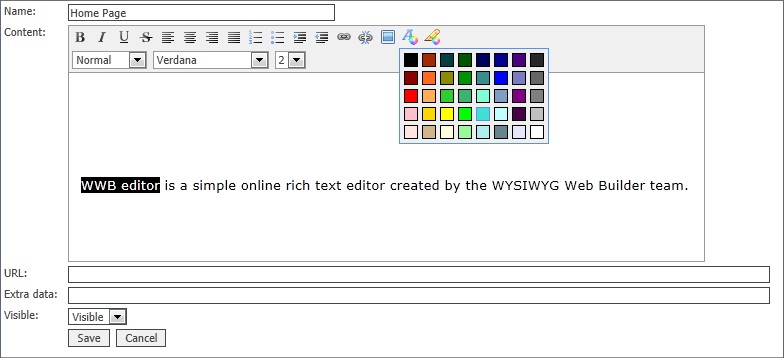
- The administrator panel supports several popular editors like CKEditor, TinyMCE and CLEditor. It also has a simple built-in editor.
- You can hide pages from the menu structure which are currently under construction.
- Uses several individual 'design blocks' to give maximum flexibility so you can easily integrate the tools into your existing layouts.
- A CMS View object, which is a place holder for the online content.
- A CMS Menu object, which can be used to navigate between online pages. The menu has many customizable options.
- A CMS search object, which can be used to search online content. The search index will automatically be created/updated by the CMS.
- A CMS label object, this can be used to display the title of the page, the creation date, author, page views etc anywhere on the page.
- Supports (optional) AJAX to allow the user to quickly navigate between pages without having to reload the whole page!
- CMS integrates with the login tools so you can assign different users to the CMS but also have a global admin.
- The CMS keeps track of the page views.
- The CMS supports external pages, so you can mix online content with standard pages. Or even pages from other websites.
- Includes a simple File Manager which can be used to upload and manage online files (like images).
Requirements:
The CMS tools require a web server with PHP and MySQL support, so the first step is to check whether your web host supports PHP/MySQL!
Step 1
The help contains all the basic information about the Content Management System. It also explains the meaning of all properties.
Step 2
The CMS requires a database to store the page data and other related information. This system uses MySQL, so your hosting account must have access to a MySQL database. Most paid hosting accounts do have database support included. And otherwise please contact your host to upgrade your existing hosting plan.
After checking if your website supports MySQL you should either create a new database or write down the details of an existing database.
Please consult the documentation of your host for more details on how to create a database. This is different for each host so there are no generic instructions we can give you for that. To be able to use the CMS tools you need to following information:
• Server
Specifies the MySQL database server. Some web hosts use 'localhost' while others have a dedicated database server. Consult the documentation of your host for the exact server name.
• Database
Specifies the MySQL database name. Either your host created (and named) the database for you or you will have to create a new database yourself in your host's Control Panel. See the documentation of your website for more details.
• UserName
Specifies the MySQL username.
• Password
Specifies the MySQL password.
Note that the required tables will automatically be created by the online admin tool (see later in this tutorial), so you do not have to create the tables manually. However if you want you can also create them yourself. See this dedicated tutorial for more details about that.
Step 3
Open the demo template
A fully functional example template is included in the 'Demo' category of the standard Templates. This template demonstrates how to use the CMS tools of WYSIWYG Web Builder.
Please first take your time to study the demo template before including the CMS tools in your own project.The most common reason for the CMS tools not to work on a website is due to configuration mistakes of the user!
To open the demo template:
- Select Menu->New Website from Template
- Select the 'Demo' category
- Click 'CMS' and the press the OK button.
- Save the newly generated project to a folder of your choice.
Start by reading the information of the 'Getting started' page.
To make the template work on your website you need to configure the MySQL properties of the following objects:
- CMS Admin object
this object is placed on the 'administrator' page of the template. - CMS View object
this object is placed on the 'content' page of the template.
For now do not change any of the other settings.
Step 4
Make sure you don't overwrite your existing website! Use a different folder.
Step 5
- Go to the administator page to setup your first page. The default password is 'password'.
- Add a new page by clicking the 'New page' option.
- In the Name field enter the name of the page. This name will be displayed in the CMS Menu.
- The Content field contains the content of the page. If you have setup one of the editors then you will see a What-You-See-Is-What-You-Get editor. Otherwise you will see the standard text input which allows you to either enter plain text or HTML code.
- The External URL field can be used to specify a link to an external page. This field should empty for standard pages! See 'How to include external pages' for more details.
- The Extra data field can be used to assign extra data to a page and make it part of the layout. See 'How to assign extra data and display it on the page?' in the help for more details.
- Visible specifies whether the page should be displayed in the CMS Menu.
- Click Save to save the new page.
- For the first page click "Home page" in the page overview to make it the initial page to be displayed, else no contents will not display.
The first page should now be visible in the 'content 'page of the demo website.
Step 6
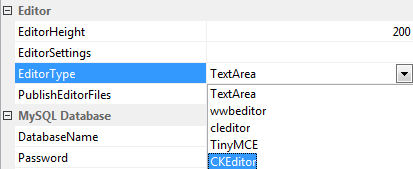
WYSIWYG Web Builder supports several popular editors like CKEditor, TinyMCE and CLEditor. The software also has a simple built-in editor (wwbeditor).
Due to license restrictions we are not allowed to distribute some of these editors with WYSIWYG Web Builder so you will have to manually install them on your computer before you will be able to use them! However once installed on your computer, WWB will take care of publishing and configuring the editors.
Installing editors (please read carefully)
For your convenience we have created setup scripts to make it easier for you to add then to your computer. They are available here:
https://www.wysiwygwebbuilder.com/free_extras.html
Step 6a
Download the editor you want to use. In this example we are using ckeditor.
Step 6b
Run setup.exe to install the ckeditor on your computer. By default it will be installed to
My Documents\WYSIWYG Web Builder\system\cms\ckeditor
However if you have changed the default document folder (in Menu->Tools->Options->Files & Folder) then the editor should be installed in that folder instead. Example: if you have set the default document folder to D:\My Projects\ then the location of the editor will be
D:\My Projects\system\cms\ckeditor
Step 6c
After you have installed the editor you can select in the CMS admin properties. Make sure you select an editor that you have installed!
If you select an editor that is not on your system or if you have installed it in the wrong folder then it's not going to work...
You can easily try out different editors by adding a 'Rich Text Area' object to an empty page. This object supports the same editors, but you can try them in local preview with different settings. So, you do not have to publish the page before you can see how it works.
https://www.wysiwygwebbuilder.com/richtextarea.html
Most editors can also be customized to add or remove buttons in the toolbars. Read more about this in the help.
Alternatively you can also install the editor manually on the server, in that case upload the entire folder from
My Documents\WYSIWYG Web Builder\system\cms\ckeditor to the server.
Example: if the page with the CMS admin was published to /public_html/ then the editor should be uploaded to /public_html/ckeditor/
Check out a live demo here: https://www.wysiwygwebbuilder.com/support/cms/
MUST READ: Trouble shooting/CMS FAQ:
https://forum.wysiwygwebbuilder.com/viewtopic.php?f=10&t=43245