Social Login
A trend in many of today’s websites is a feature that allows users to sign in via their social network accounts. For example, some websites have the option to use their Facebook, Twitter, Google, Yahoo or GitHub account to log in without having to register an account.
With "Social Login", users can sign-on to password protected pages using existing information from a social networking service.
When the user clicks the login button they will be redirected to the website of the provider (Facebook, Twitter etc.). Here they are asked to authorize the website. After a successfully login the user will be redirected back to your website.
WYSIWYG Web Builder can store the information about the user in a database such as email, name, website etc. Note however that not all providers (like Twitter) do return an email address, but they all include a identification number.
Besides standard information like email and name, you can also store other information specific to each social provider. For example, for Facebook you can store the user's Facebook page or avatar.
Features:
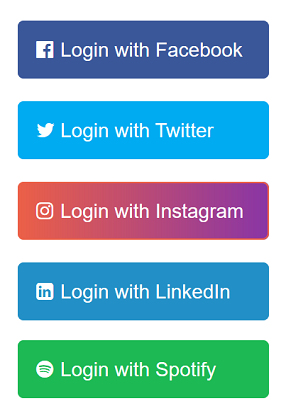
- Supported providers: Facebook, Google, Twitter, Spotify, LinkedIn, Tumblr and Instagram.
- Use in combination with the Login Tools, including avatars (if supported by the provider).
- Configure a dedicated user role to give social users access to specific pages only.
- Store information about the logged in user in a MySQL database.
- Send an email to the administrator when a new user account has been created.
- The logon buttons support many styling option including icon.

Part 1: Provider configuration
At a technical level, WYSIWYG Web Builder uses Hybridauth (https://hybridauth.github.io/) which implements a number of open protocols (i.g, OAuth and OpenID) to connect and communicate with various social networks APIs in a secure and standardised manner.
In order connect to a social network API, you will have to register an application on the social site to get Developer API(OAuth) Key and Secret key. Unfortunately, this process is different for each provider, so there are no generic instructions for this.
In this tutorial we use Facebook as an example.
Step 1
Go to the Facebook developer's website: https://developers.facebook.com/apps and create a new application by clicking "Create New App".
Step 2
Fill out any required fields such as the application name and description.
Step 3
Once you have registered, copy and paste the created application credentials (App ID and Secret).
You will need them later in this tutorial (part 2).
You also need to add a valid Oauth redirect URI (https://developers.facebook.com/docs/facebook-login/security/).
This should be the social login callback url of your website (ie. http://mywebsite.com/path_to_socila_login/?hauth.done=Facebook)
Part 2: WYSIWYG Web Builder configuration
Step 1
Add the Social Login button to the page.
Step 2
Select the provider. In this case, Facebook
Step 3
Enter the App ID in the 'Key' property and App Secret in the 'Secret' property.
Step 4
Optionally, you can also configure a MySQL to store the user's information for the next time they login.
If you leave the MySQL fields empty, then no database will be stored. More information about the database structure can be found in the help.
Social Login
With "Social Login", users can sign-on to password protected pages using existing information from a social networking service.
When the user clicks the login button they will be redirected to the website of the provider (Facebook, Twitter etc.). Here they are asked to authorize the website. After a successfully login the user will be redirected back to your website.
WYSIWYG Web Builder can store the information about the user in a database such as email, name, website etc. Note however that not all providers (like Twitter) do return an email address, but they all include a identification number.
Besides standard information like email and name, you can also store other information specific to each social provider. For example, for Facebook you can store the user's Facebook page or avatar.
- Supported providers: Facebook, Google, Twitter, Spotify, LinkedIn, Tumblr and Instagram.
- Use in combination with the Login Tools, including avatars (if supported by the provider).
- Configure a dedicated user role to give social users access to specific pages only.
- Store information about the logged in user in a MySQL database.
- Send an email to the administrator when a new user account has been created.
- The logon buttons support many styling option including icon.
At a technical level, WYSIWYG Web Builder uses Hybridauth (https://hybridauth.github.io/) which implements a number of open protocols (i.g, OAuth and OpenID) to connect and communicate with various social networks APIs in a secure and standardised manner.
In order connect to a social network API, you will have to register an application on the social site to get Developer API(OAuth) Key and Secret key. Unfortunately, this process is different for each provider, so there are no generic instructions for this.
In this tutorial we use Facebook as an example.
Step 1
Go to the Facebook developer's website: https://developers.facebook.com/apps and create a new application by clicking "Create New App".
Fill out any required fields such as the application name and description.
Once you have registered, copy and paste the created application credentials (App ID and Secret).
You will need them later in this tutorial (part 2).
You also need to add a valid Oauth redirect URI (https://developers.facebook.com/docs/facebook-login/security/).
This should be the social login callback url of your website (ie. http://mywebsite.com/path_to_socila_login/?hauth.done=Facebook)
Step 1
Add the Social Login button to the page.
Select the provider. In this case, Facebook
Enter the App ID in the 'Key' property and App Secret in the 'Secret' property.
Optionally, you can also configure a MySQL to store the user's information for the next time they login.
If you leave the MySQL fields empty, then no database will be stored. More information about the database structure can be found in the help.
The steps for adding other providers are mostly the same, however each social network has its own way of registering apps to get the keys.
The following links may be helpful for registering apps for other providers:
https://hybridauth.github.io/hybridauth/userguide/IDProvider_info_Facebook.html
https://hybridauth.github.io/hybridauth/userguide/IDProvider_info_Google.html
https://hybridauth.github.io/hybridauth/userguide/IDProvider_info_Instagram.html
https://hybridauth.github.io/hybridauth/userguide/IDProvider_info_LinkedIn.html
https://hybridauth.github.io/hybridauth/userguide/IDProvider_info_Tumblr.html
https://hybridauth.github.io/hybridauth/userguide/IDProvider_info_Twitter.html