Using Layers in WYSIWYG Web Builder
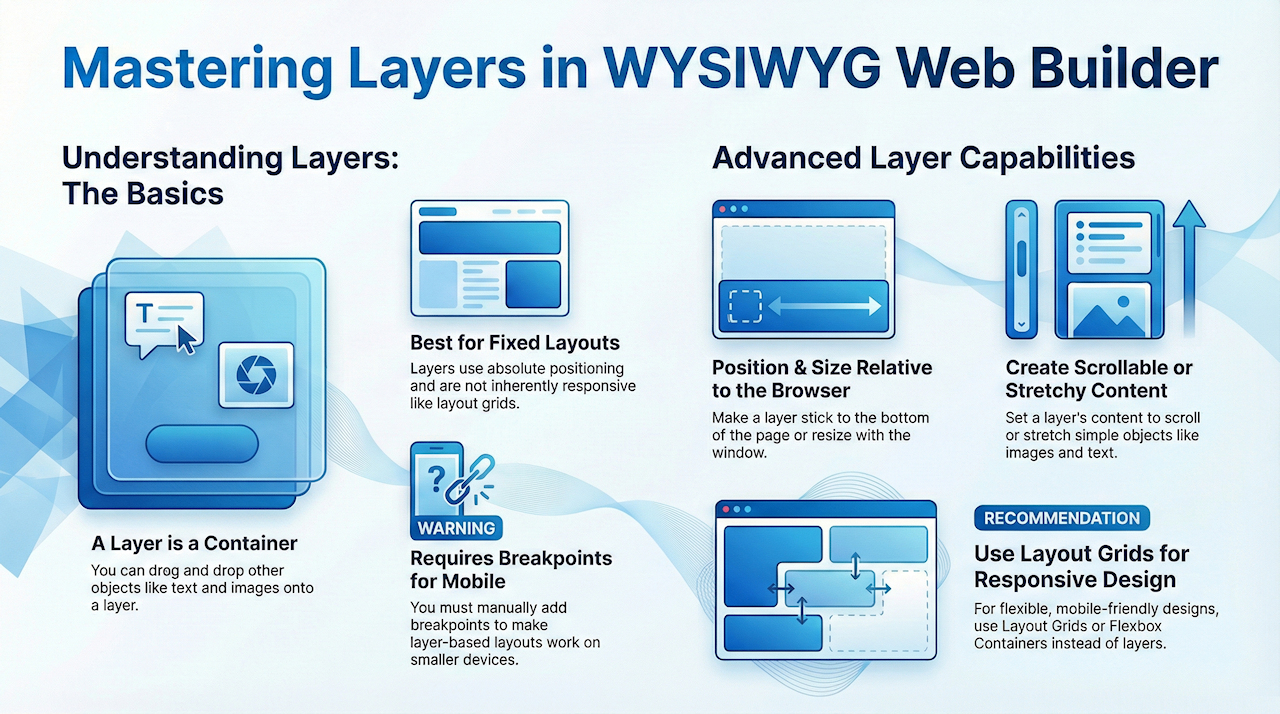
A layer is a container for other objects. You can make objects part of a layer by using drag & drop.
When you drag an object over a layer in the Web Builder workspace you will notice that the layer's border will temporary highlight to indicate that the object will become part of the layer.
Layers can be used to create advanced layouts like scrollable or scalable content.
This tutorial will demonstrate some of those features.
Layers are primarily designed for use with absolute or fixed layouts. Unlike layout grids, they are not inherently responsive. To ensure proper display on smaller devices, you will need to implement breakpoints.
Additionally, combining layers with layout grids or other flexible containers is generally not recommended, as it can lead to overlapping elements or other unexpected behaviors. For a consistent and reliable layout, we recommend using the same container type for all elements on the page.
Additionally, combining layers with layout grids or other flexible containers is generally not recommended, as it can lead to overlapping elements or other unexpected behaviors. For a consistent and reliable layout, we recommend using the same container type for all elements on the page.
Changing the transparency of a layer
Opacity can be used to control the transparency of a layer and its content.
You can see an example of this in the How to create a draggable window using layers? tutorial.
You can see an example of this in the How to create a draggable window using layers? tutorial.
Make a layer stick to the bottom of the page
You can make a layer stick to the bottom of the page, by giving the 'bottom' property a value.
For example if you set the bottom property to 10, then the layer will be positioned 10 pixels from the bottom of the page.
Click here for an example.
For example if you set the bottom property to 10, then the layer will be positioned 10 pixels from the bottom of the page.
Click here for an example.
Positioning a layer relative to the browser window
Instead of using absolute coordinates, the position of the layer can also made relative to the page size with the Relative horizontal position and Relative vertical position properties.
Click here for an example.
Click here for an example.
Size a layer relative to the browser window
Instead of using absolute dimensions, the size of the layer can be made relative to the size of the browser window with the Relative horizontal sizing and Relative vertical sizing properties. This can be useful to create a header or footer for a web page.
Click here for an example.
Click here for an example.
Stretch the content of a layer
In some cases it can be useful to make part of a page stretchable (scale the content based on the size of the browser window). For example in headers or footers.
In combination with the relative size properties of a layer (Relative horizontal sizing and Relative vertical sizing), you can scale the content of the layer by setting the alignment to 'Stretch content'.
This option will only work for simple HTML objects like images, shapes or text. It will not work for advanced objects like menu's, extensions, blog, galleries etc. These objects can not be stretched.
Also note that stretching images may have a negative effect on the quality of the image!
Click here for an example.
Create scrollable content with a layer
You can make the content of a layer scrollable by setting the 'overflow' property to 'scroll' or 'auto'.
To create/update the content of the layer, you must resize it in the designer so all objects will be visible.
After you've created/updated the layout you can resize the layer to the desired size.
You cannot scroll the contents of the layer inside Web Builder.
To create/update the content of the layer, you must resize it in the designer so all objects will be visible.
After you've created/updated the layout you can resize the layer to the desired size.
You cannot scroll the contents of the layer inside Web Builder.
Implement flexible layouts
Layers are best suited for absolute or fixed layouts. For flexible, responsive designs, consider using Layout Grids, Flexbox Containers, or Flex Grids instead. The difference is explained here: https://www.wysiwygwebbuilder.com/layout_modes.html