Creating a Form

How do I create a form in WYSIWYG Web Builder?
Important
Every input control that should be submitted must be inside the form area. Controls outside the form are not included in the submitted data.
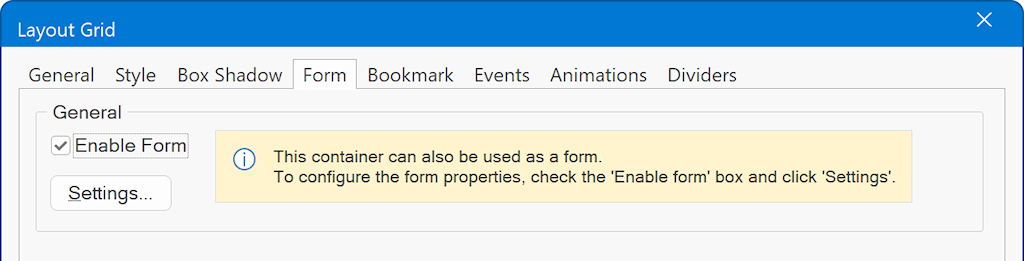
A Layout Grid, Layer, Dialog, Tabs object, or Flex Container can also act as a form when its form functionality is enabled.
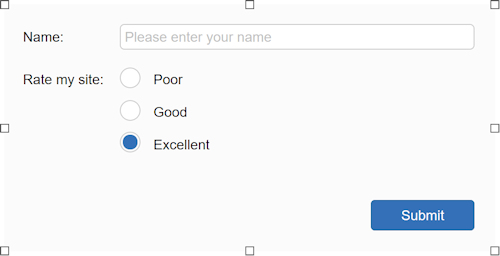
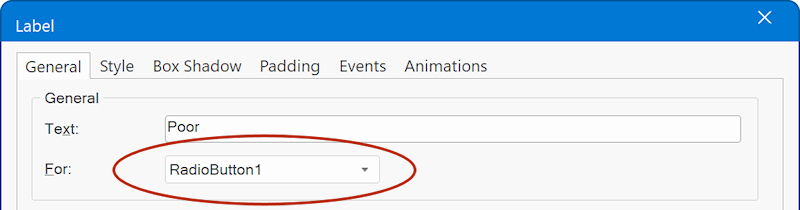
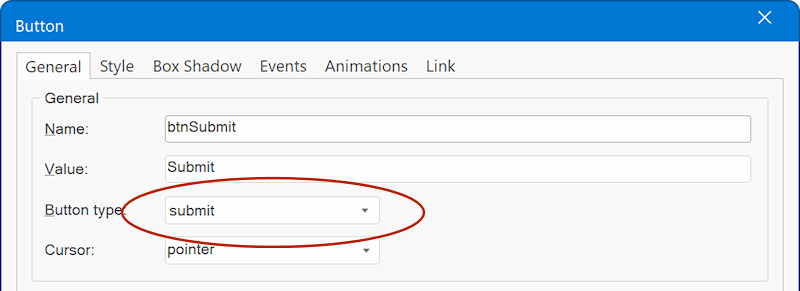
Finally, set the Button's Type property to “submit.” Clicking it will submit the form using the processing method configured in the form properties.
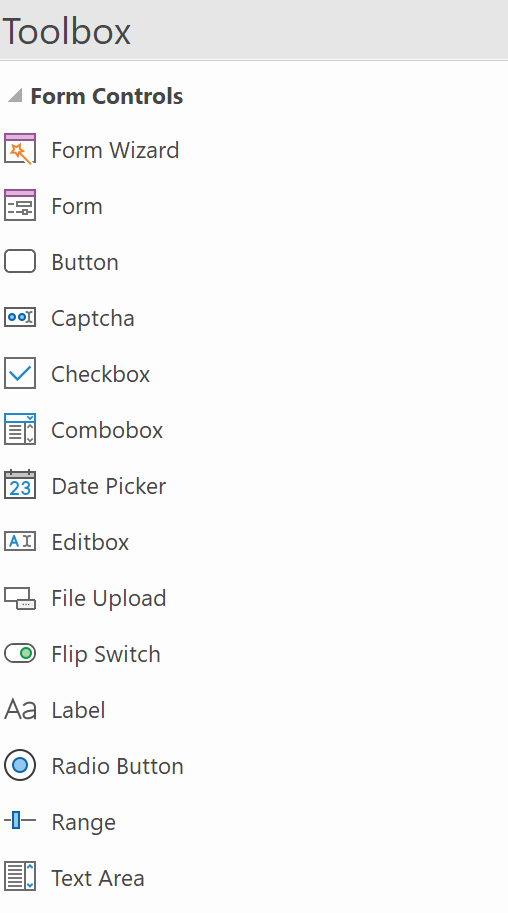
Form Input Fields
https://wysiwygwebbuilder.com/form_input_fields.html
Form Action
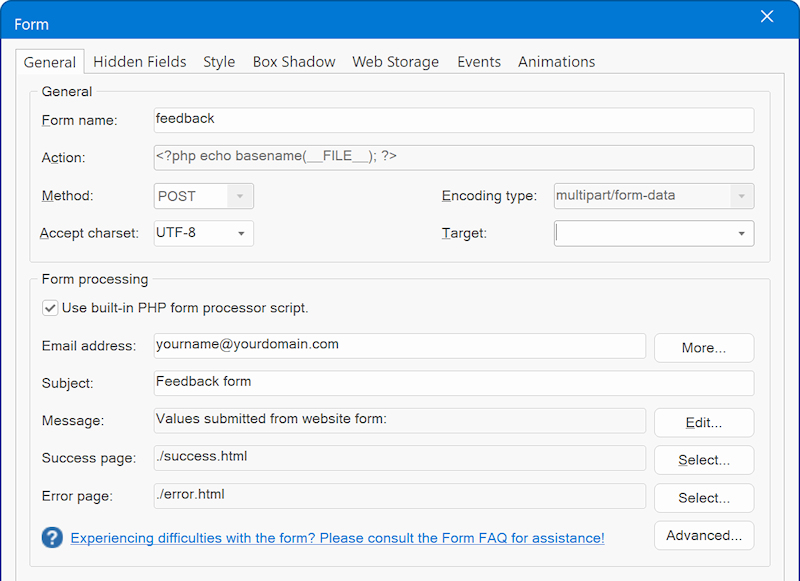
The form's “Action” determines where submitted data is sent and how it is processed.
Choose the method that matches your hosting environment:
- mailto: opens the visitor's email application (unreliable; not recommended)
- Built-in PHP Form Processor: processes submissions on a PHP-enabled server
- Custom script: sends the data to your own server-side endpoint
- Third-party service: sends the data to an external form-processing provider
Use mailto (not recommended)
mailto:youremail@example.com
When the form is submitted, the visitor's default email application is asked to create a message containing the form data. The visitor must then send that message manually.
This method is unreliable because it depends on the visitor having a correctly configured email application, and it may expose submitted values in a draft message. Use a server-side processor whenever possible.
See also: https://forum.wysiwygwebbuilder.com/viewtopic.php?t=135
Use the Built-in PHP Form Processor
Important
The built-in processor requires PHP, so publish the form to a web server with PHP support.
Set the form page's File Extension in Page Properties to “php”; otherwise the server will not run the processor.
Do not test PHP processing only from a local file preview. Publish to a suitable test location and submit the form there.
Enter the address that should receive the form results. Use “More” to add CC or BCC recipients; separate multiple addresses with commas.
Subject (required)
Enter a clear subject for the notification email.
Message (required)
Enter the introductory message that will appear before the submitted data.
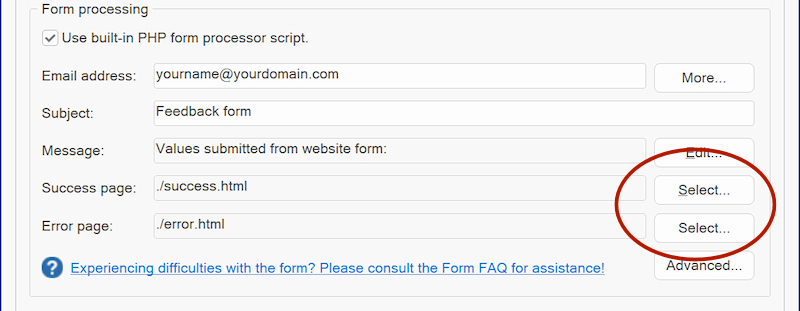
Success page (required)
Select the page visitors should see after a successful submission, such as a confirmation or thank-you page.
Error page (required)
Select the page visitors should see if processing fails. Add ##error## to text on that page to display the processor's error message.
See the Form FAQ for additional guidance.
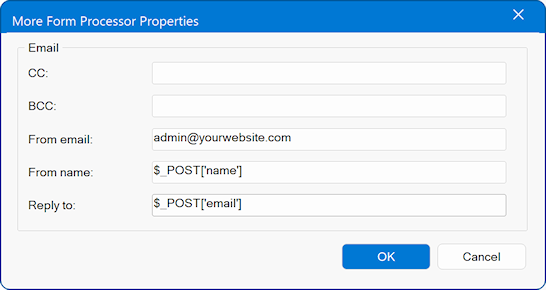
By default, the built-in form processor uses the form’s email field as the sender’s email address (From address).
However, many web hosting providers do not allow emails to be sent from addresses outside your website’s domain.
To avoid this issue, click More and configure a fixed From address that belongs to your website’s domain.
Set the Reply To field to $_POST['email']. This ensures that replies are directed to the email address entered by the visitor, while the message itself is sent from your website’s email address.
For more information, see the Form FAQ.
Configuration checklist
- Use only one form with the built-in PHP processor on a page.
- Always configure both a Success page and an Error page; leaving either setting empty can produce a blank response. These destination pages do not need a .php extension and should not contain PHP code because their generated content is loaded directly by the processor.
- Every submitted control must have a valid, unique Name.
- Avoid spaces, commas, periods, hyphens, and other special characters.
- The controls' z-order determines their order in the generated email; use Object Manager or the Arrange commands to change it.
Advanced Form Properties
By default, uploaded files can be attached to the notification email. You can instead save them to a server folder; that folder may require write permission. Hosting providers impose their own upload-size limits, which override any larger value configured in the form. If you use a custom processor, its script must handle uploads explicitly.
Before publishing, use HTTPS, validate important fields, configure spam protection, restrict upload types and sizes, and avoid sending sensitive personal data through ordinary email. Test successful submissions, invalid input, upload limits, the success page, and the error page.
See the Help or select “Advanced” to review all available options.
Email delivery note
Many hosting providers require authenticated SMTP and a fixed From address belonging to your website's domain. Configure PHPMailer in Advanced properties when required. Use the visitor's email address as Reply-To rather than From so replies still go to the visitor without conflicting with server, SPF, or DMARC policies. If messages do not arrive, check spam folders and ask your host for the exact mail-server requirements and error details.
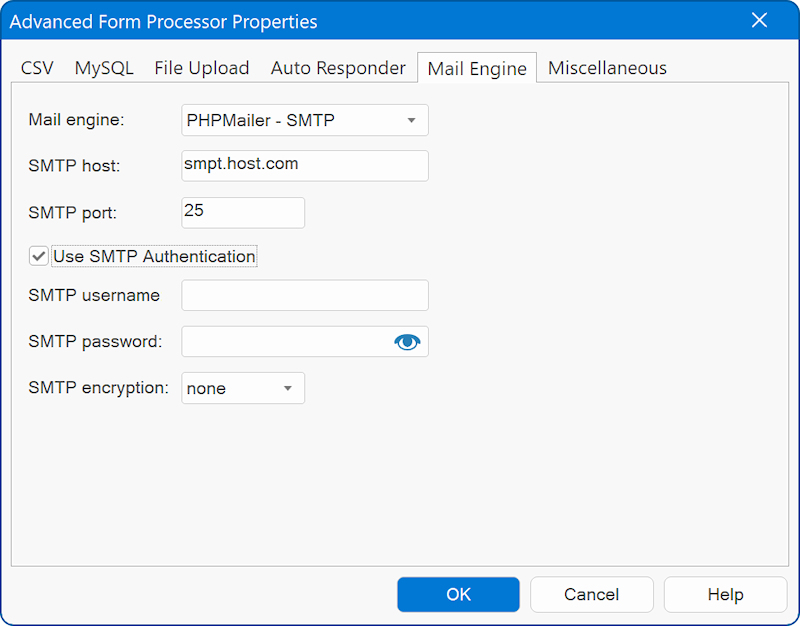
Email customization and autoresponder
The built-in Form Processor also lets you customize the messages it sends. You can set a From Name, choose a fixed sender address, and configure a Reply-To address so replies go to the visitor.
An optional autoresponder can send a confirmation message to the address entered in the form. Notification and autoresponder messages can be formatted, and form-field values can be inserted with variables. For example, to include the visitor's name or submitted details in the subject or message.
Additional options are available for message formatting, headers, recipients, attachments, and delivery. See the Form FAQ for more details.
Custom or third-party processing
Turn off “Use Built-in PHP Form Processor Script,” then enter the processor endpoint in the form's “Action” field. Confirm the required HTTP method and field names in the processor's documentation, and review its privacy, retention, and spam-protection settings before collecting real data.
An example custom PHP form script is available for advanced users at:
https://www.wysiwygwebbuilder.com/forms_php.html
Using a form in a flexible layout
The Form Wizard can also create a flexible form based on layout grids.
Troubleshooting a form
Test with a minimal form and check the server or hosting error logs. Mail delivery problems may require authenticated SMTP through PHPMailer. For additional solutions, see “Frequently Asked Questions about Forms.”
Diagnostic note
- If PHP source code appears in the browser, verify the .php extension, publish to a PHP-enabled server, and do not test from a local file preview.
- A “headers already sent” warning usually indicates manually inserted code, spaces, or blank lines at Start of Page; remove that content and check for other PHP-generating objects.
- CAPTCHA must be inside the form. Publish all CAPTCHA files and confirm that the server supports PHP, the GD library, and PHP sessions before testing it.
- If you need our assistance with the configuration of your form, then you will first have to contact your web host and ask them why the emails are not sent. For example, they may have specific requirements or restrictions (no support for mail, smtp limitations, 'from email must be within domain' etc). Only with the feedback of your web host you can solve configuration issues, because different web hosts need different settings! We cannot help you, if you do not know what the exact error is.
Demo project (WBS)
https://www.wysiwygwebbuilder.com/support/form_demo.zip
Open the WBS file to inspect the form settings, control names, radio-button group, and submission workflow.