Linking your pages together
Linking text

Linking images, shapes and other objects

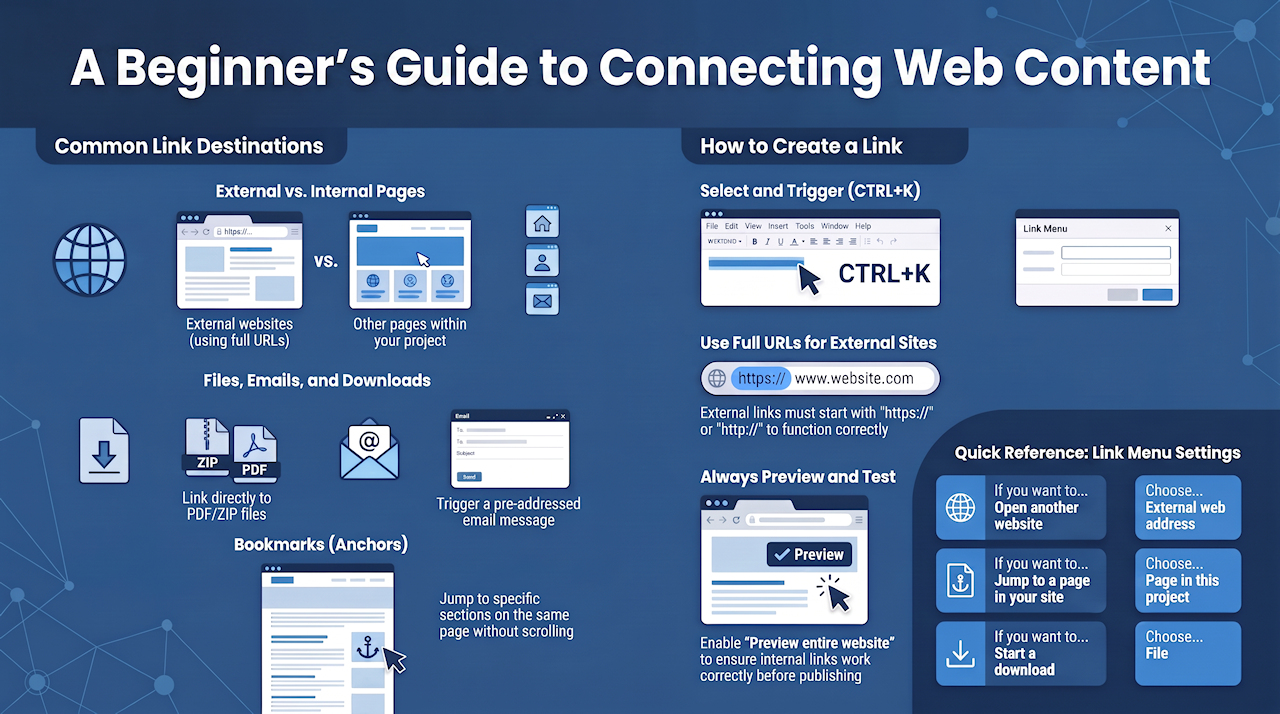
Link to a page on another website
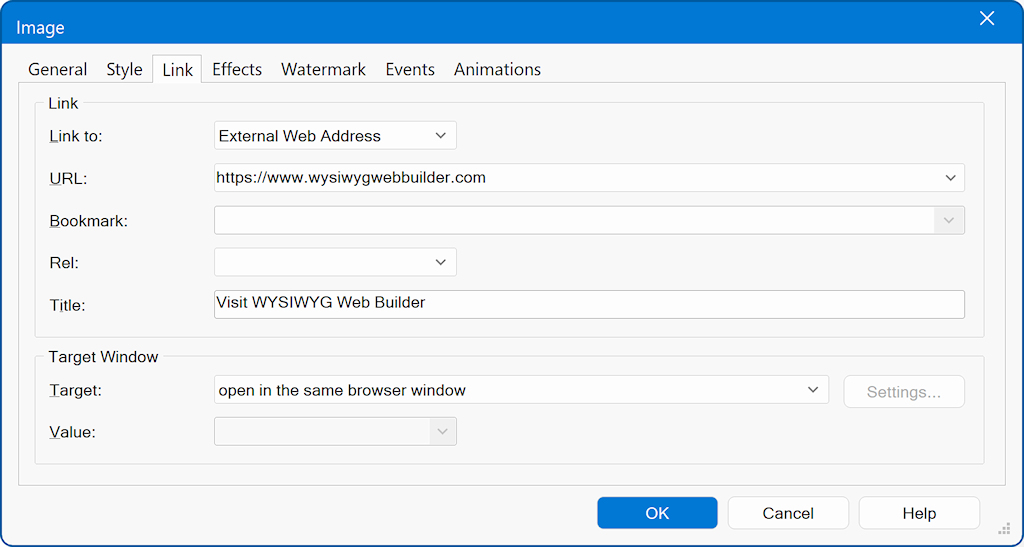
- Select the text or object.
- Open Insert -> Link.
- Set Link To to External web address.
- Enter the complete URL (Internet Address) of the destination page in the URL box.
External URLs MUST begin with "https://" or "http://" or else they will not work.
For example, to link to the Pablo Software Solutions home page, type "https://www.wysiwygwebbuilder.com/" instead of "www.wysiwygwebbuilder.com". - Click OK.
- Preview and test the link.
Tip:
To test internal links locally, make sure Preview the entire website is enabled. This ensures that the linked pages are available during the preview.
See also: Preview a page in your Browser
Link to a page on your own website
- Select the text or object.
- Open Insert -> Link.
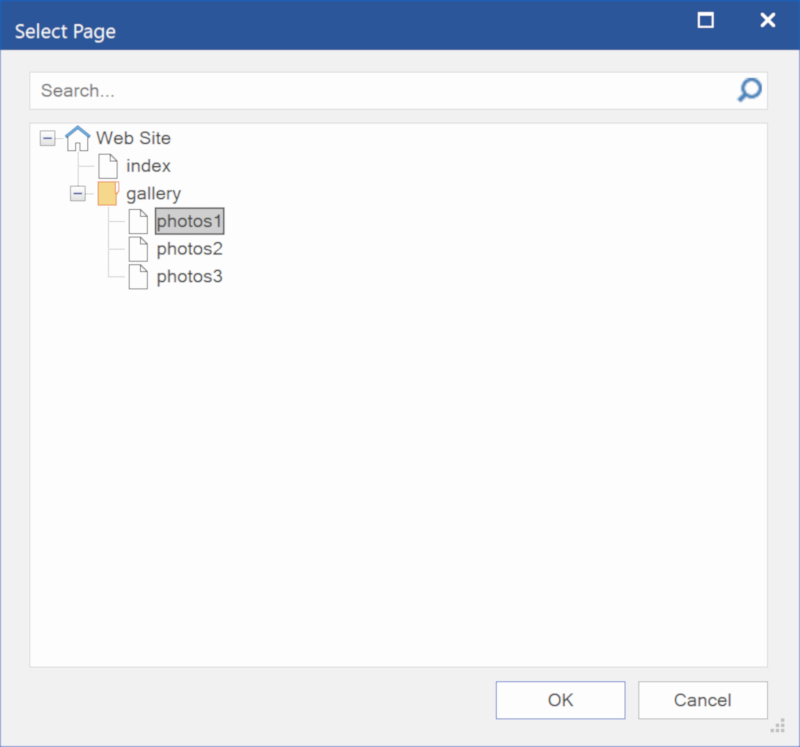
- Set the Link To option to Page in this project.
- Click 'Select' to choose a page. This will list all pages that are part of the current website project.
Select one of the pages and a relative link will automatically be created (e.g. ./products.html). - Click OK.
- Preview and test the link.
Link to a file (ZIP, PDF etc)
This option can be useful if you want to create a download link for a ZIP or PDF file.
- Select the text or object.
- Open Insert -> Link.
- Set the Link To option to File.
- Browse for the file you wish to create a link for. WYSIWYG Web Builder will automatically upload the local file to your website when you publish your page.
- Click OK.
- Preview and test the link.
Note: When linking to large files, it may take a while before the file is transferred to your website!
Also note that you cannot open a file in a popup window. Popups only work for HTML files.
Link to an email address
Open Insert -> Link.
Select Email Address from the Link To dropdown list.
The URL box will automatically be updated with the mailto: prefix. Now enter the destination email address like this:
mailto:webmaster@yourdomain.com
You can also include a subject for the email like this:
mailto:webmaster@yourdomain.com?subject=Website Feedback
Click OK.
Preview and test the link.
Target Window or Frame
- Open in the same browser window, this option will set the target of the link to _self.
- Open in a new browser window, this option will set the target of the link to _blank.
- Open in another window or frame, this option lets you specify a custom target.
Examples:
_parent, opens the link in the parent frame
_top, opens the linked page in the topmost frame
iframe1, specify the name of an inline frame, to open the linked page in an inline frame. - Open in a popup window, this option will open the linked page in a (javascript) popup window. Click 'Settings' to specify the properties of the popup window.
Bookmarks (Jump to another part of the page)
Step 1
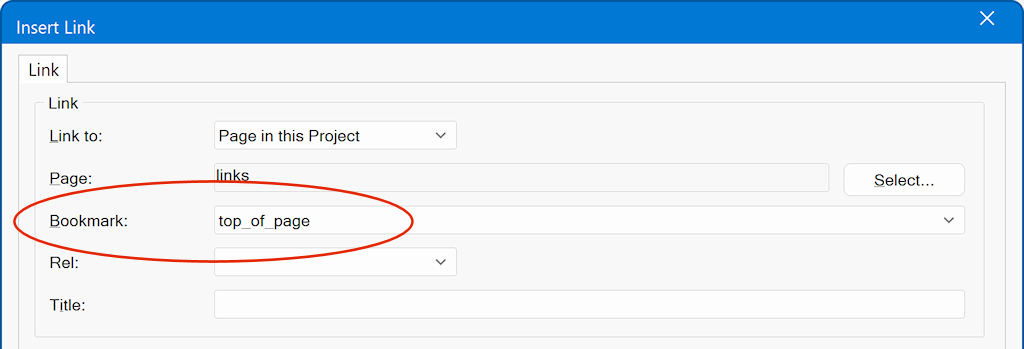
You can create a Bookmark by using the Bookmark tool from the Insert menu.

Move the bookmark icon to the position where you want the page to jump to if the user clicks the link. In this case let's jump to the top of the page.

Make sure you give the bookmark a useful name (ID).
You can set the ID of the bookmark in the Property Inspector, Object Manager (context menu) or by clicking the ID in the statusbar when the bookmark is selected.
Once you have placed the bookmark icon on your page, it can be selected from the Bookmark dropdown list.
Bookmarks also support smooth scrolling and events. See these related tutorials to learn more:
How to reveal objects on scroll with bookmark events?
How to use Affix and ScrollSpy?
A common use for bookmarks is to let users quickly return to the top of a page. For example, you can place an icon on a sticky layer and link it to the page header.
This functionality is used in the following templates:
https://www.wysiwygwebbuilder.com/support/wb21tryouts/wb21_inthecloud.html
https://www.wysiwygwebbuilder.com/support/wb21tryouts/wb21_teacher.html
https://www.wysiwygwebbuilder.com/support/wb21tryouts/wb21_travelblog.html
and many others
The rel property
The Rel property describes the relationship between the current page and the linked page. It may also affect how browsers handle the link and how search engines interpret it. You can select more than one value when necessary. For normal internal links and regular external links, you can usually leave this property empty.
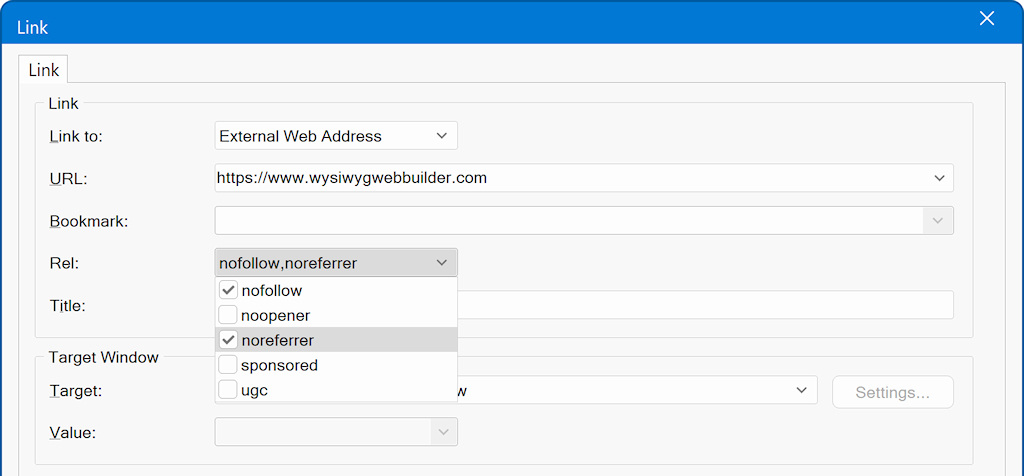
The following values are available:
nofollow
Indicates that you do not endorse the linked page or do not want search engines to associate your website with it. This is only a signal to search engines and does not guarantee that the linked page will not be crawled or indexed.
noopener
Prevents a page opened in a new window or tab from accessing the original page through JavaScript. Use this for additional security when the target is set to open a new window.
noreferrer
Prevents the browser from sending information about the referring page to the linked website. This option also includes the behavior of noopener.
sponsored
Identifies a link as an advertisement, affiliate link, sponsorship, or other paid placement.
ugc
Identifies a link that was added through user-generated content, such as a comment, review, or forum post.
Multiple values can be combined. For example, a paid link may use "sponsored nofollow".
Tip:
Select only the values that apply to the link. Selecting every option does not provide additional benefits. The rel property should not be used to prevent one of your pages from appearing in search results; use the page’s robots or noindex settings for that purpose.
Smart Links
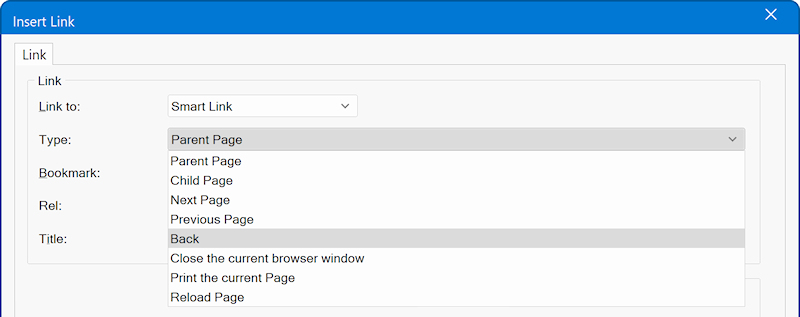
Smart links can be used to link to the next, previous, parent or child of the current page. If you change the structure of your website, these links will automatically update to represent the current state.
The following smart link options are available:
- Parent Page
Link to the parent of the current page. - Child Page
Link to the first child of the current page. - Next Page
Link to the sibling to the right of this page. - Previous Page
Link to the sibling to the left of this page. - Back
Go back to the previous page in the browser's history. - Close the current browser window
Close the current browser window, this feature is not supported by all browsers! - Print the current page
Clicking the link will print the current page. - Reload Page
Clicking the link will reload/refresh the current page.
Overpaste Links
Use Overpaste to quickly turn selected text, images, shapes, and other supported elements into hyperlinks. Instead of replacing your selection, the pasted URL is automatically attached to it, making link creation faster and more intuitive.
For step-by-step instructions, see Overpaste Links.
URL Parameters for Internal Links
Enter each parameter as a name and value separated by an equals sign:
category=books
To add multiple parameters, separate them with an ampersand (&):
category=books&id=15
For example, if the selected page is products.html, the generated link will look like this:
products.html?category=books&id=15
The destination page must contain the necessary code or functionality to read and use these values. Adding parameters does not change the page by itself.
URL parameters are visible in the browser’s address bar. Do not use them for passwords or other sensitive information. Make sure spaces and other special characters in parameter values are properly URL-encoded
What to do when links do not work?
- Did you use a valid URL? A valid link starts with 'http://' or 'https://'
So www.wysiwygwebbuilder.com is not correct, it should be https://www.wysiwygwebbuilder.com
- If internal links do not work after publishing, make sure all linked pages have been published. To test internal links locally, enable Preview entire website so the linked pages are included in the preview.
- If the link cannot be clicked in the browser then make sure that no other objects overlap the link.
Links should always be 'on top'. You can use the Arrange Tools (move to front) or Object Manager to change the order (z-index) of objects.
- Maybe you have added events to the object?
For example, the 'onclick' event will overwrite the default behavior of the click action, so in that case the browser will not trigger the link.
Related FAQ topic:
https://forum.wysiwygwebbuilder.com/viewtopic.php?f=10&t=37833